
 Before anything else, print off some old stamps like these on the left. No, I didn't make these look old. They printed out that way! There are several at this website. I am not sure all of them apply, but that's ok. From what I can tell, the cost of the stamp was determined by the size of the letter or package so all of them were used during this time period. The one, two, and three cent stamps seem to be the most likely ones that would be seen on the kinds of letters we are making. After printing the stamps, cut them out. They do not have to be cut out perfectly. Just wiggle the scissors back and forth as you cut to make the zigzag-ish effect on the stamps. They are old; they shouldn't look perfect.
Here are the rest of the steps:

Pictured Above is all the stuff you'll need:
- Some plastic to cover your workspace (I cut open an old shopping bag)
- The Postage Stamps
- Envelopes (Mine are assorted sizes for authenticity...and because I ran out of the larger kind.
- Brown paint (Mine is acrylic, but finger paint/tempera paint works, too.
- Paper Towels (Just in case...)
- Assorted Pens
- Glue Stick
- Sponge Brush
- Small Paintbrush (For stirring...)
- A Cup or Mug
- and Water, which is not pictured because I got the water from my sink which was in a different location than my desk.
 Step One: Pour a little brown paint into your cup or mug.
 Step One: Pour a little brown paint into your cup or mug.
 This looks about right.
  Step Two: Add water until it resembles muddy water. I would guess that this about 3/4 cup. Stir with a paintbrush so that the brush part can get the paint off the bottom as it is stirred into the water. It should be as thin and as runny as water.
  Time out for just a second: Can you see what this mug says on the side? "The only thing children wear out faster than shoes are parents and teachers." Smile.
  Step Three: Dip the sponge brush into the brown paint water. Press the sponge against the side to get rid of excess. Repeat every time you use this brush.
 Step Four: There are actually a few ways to do this part. One way is to just paint the letter front and back. I don't know if you can tell, but I love how this particular letter is addressed to, "Dear Mrs. Lady."
 There is no real technique to it. Just paint until there is no white space left.
 Turn it over, and...
 ...paint the back the same way.
  Here is another way that was invented when I got tired of painting all of the letters. This way gets some of your frustrations out, and it gets delightfully messy. (FYI: Pictured at left is a completely different letter than the "Dear Mrs. Lady," one.):
 Crumple the letter into a wad.
 Dunk it into the paint water. Submerge it all the way before taking it out of the water. (Please NOTE: Do not wring it out. I forgot that I shouldn't do that, and it made it very difficult to unfold later. Just let it drip into the cup.)
 Unfold the letter and lay it flat. If it tears, that's ok. This letter is supposed to be super old and fragile. It adds to the character of the letter. Sometimes the rips and tears freak students out a bit, but once you tell them that they were already like that, they seem to make peace with it.
 Step Five: Paint the envelope back with paint water.
 Turn it over, and paint the front, too. Try not to get the parts that have glue (like the seams that hold the envelope together) too wet. If the seams get to wet, the entire envelope will fall apart. Fortunately, scotch tape had been invented by the 1930's. Surely they would have had some at the White House to repair these letters...
 Make sure you paint the front flap like this. If you paint it on the other side, you will just get the seams more wet, and you don't want that.
  All painted!
 Here's another way to age an envelope.
  Crumple up the envelope - because it is SO much fun!
 Do NOT dunk it! It will make the seams too wet, and the envelope will fall apart. Paint the envelope. Let the paint water settle into the wrinkles...
  ...like this. Let it dry a bit, then flip it over, and paint the other side.
 Step Six: Let everything dry! When I did this the first time, I laid out a couple of garbage bags I had cut apart in the floor so I could lay the letters and envelopes on them to dry. Then...
...this came along. "This" would be my dog Buddy, and his snowman that he got for Christmas...and about four blankets and two pillows that he stole to make a "nest." He is dazed by the camera flash that awoke him from his nap. He has a thing about laying on any papers in the floor, so last time, I moved everything from the floor to all of the couches and my bed. This time there are only two of each because I have already done all of mine before. :)
.....
 Step Seven: Once they are dry, apply glue to every edge and corner to the back of the stamps before adhering them to the envelopes.
  Step Eight: Press the edge of the stamp to the envelope. Look how weird my fingers look!
 Step Nine: Use various pens to address the envelopes to Mrs. Roosevelt. The address is 1600 Pennsylvania Avenue, Washington, D.C. 20006. I actually took mine to church and asked lots of random people to address them so that they would have various handwritings. The ones that turned out the best were from senior adults. Their handwriting had that pretty old style. Asking other people to address the envelopes also varied the way Mrs. Roosevelt was addressed. Some said "Eleanor Roosevelt," some said "Mrs. Roosevelt," and one even said "First Lady."
 Step Ten: Look how wrinkled and ripped the one on the right is. They are both dry, so fold them to be stuffed into envelopes.
  Step Eleven: Stuff them into the envelopes however you can (especially for itty bitty envelopes).
 Step Twelve: Do not seal them shut! Just tuck in the flaps so that they can be used over and over again.
 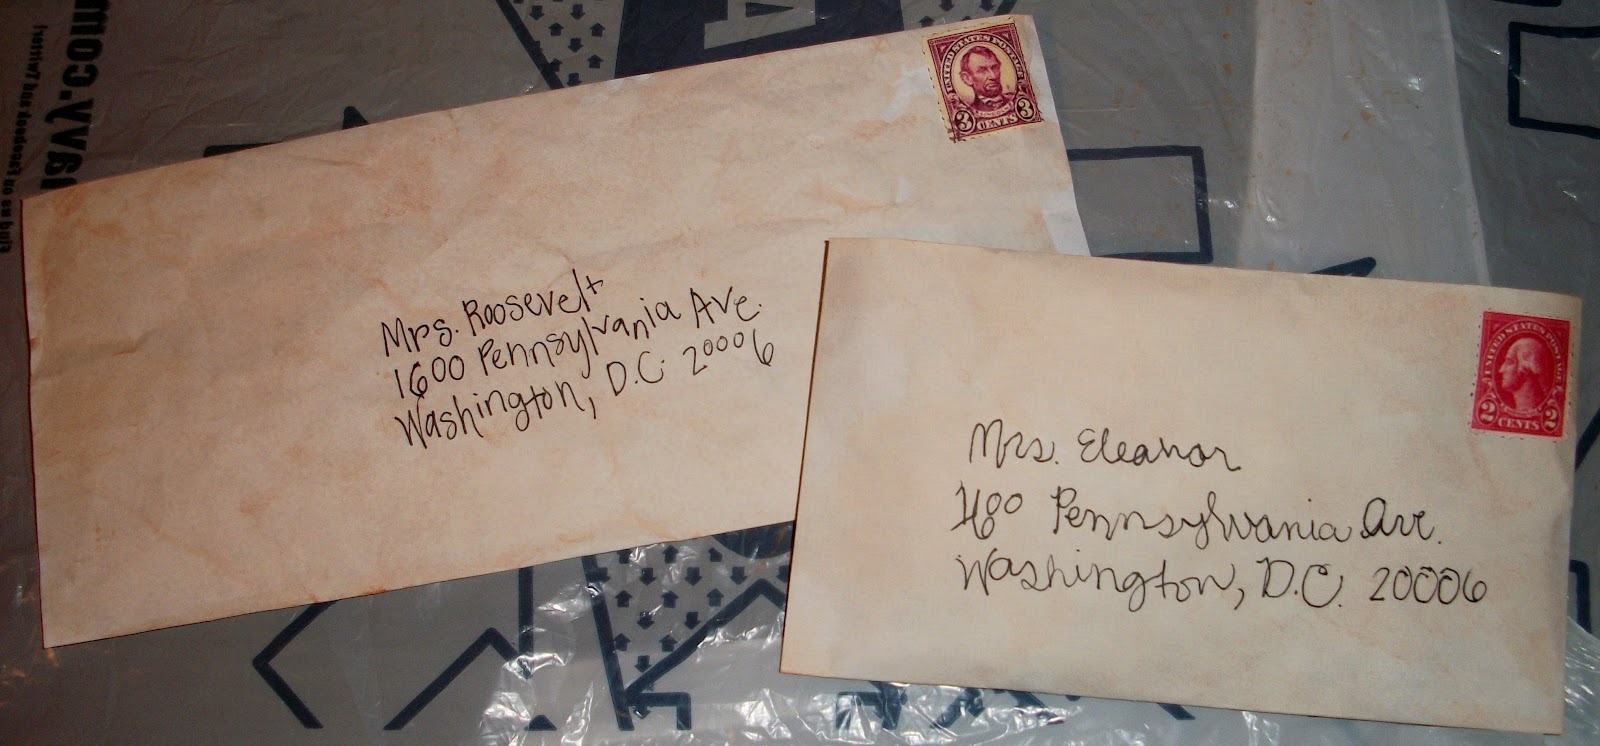 Ta-Da!
I hope you enjoyed this tutorial! Let me know how you use these in your classroom.
Enjoy!


