Showing posts with label Alabama History. Show all posts

Wednesday, May 16, 2012

Washington's Treasures - My New Favorite Game


This is a screenshot of one of my new favorite games! I played this game an embarrassingly long time. This game is Washington's Treasures, and it is ah-mazing. You, the player, are transported back to a 3D rendering of Mount Vernon at the time when Washington still lived there. You have to explore his mansion and estate, interviewing various members of the household as you search for Washington's most treasured items.

There are several reasons why I really, really love this game:
  1. It is a game. It is a history website, and it is a game. I feel that I am talking like Dug from Up...
  2. It is a quality game...with sound...and it is historically acurate...and fantastic!.
  3. You have to interview three people before grabbing each mystery object. The people to interview change for each item. They can be people who work(ed) for Washington, Washington's family members, Washington's slaves, and/or Washington himself.
  4. You get to see what the people you interview would have been doing back then... (for example, you get to see what a blacksmith would be doing on a typical day while you interview him).
  5. When you pick up one of the treasures, you get to see a photo of the actual treasured artifact and get to read a little bit about it - a very little bit (It keeps students engaged enough to read while staying short enough so they can move on with the game!)
  6. Students can collect bonus items for an end of the game bonus. You get to see a photo of the actual treasured artifact and get to read a little bit about each of these, too!
  7. You can go in most of the buildings on the estate. Whether you can or cannot go into them, though, you still get to read a little about each building and what it was for when you go up to its door.
  8. There is audio for this game, and you can hear the voices of each character.
  9. THERE IS SO MUCH MORE! I'm going to go play again...
  10. Do you need more reasons? Go there now! Play! Have fun!
Enjoy!

Wednesday, May 9, 2012

*GASP* Tuskegee Airmen Flight Leader Simulation!

Have you seen it? Have you seen it? Have you seen it?! This website is so stinkin' awesome! This is...are you ready for this?...This is a Tuskegee Airmen Flight Leader Simulation (When the page opens, scroll down to the bottom of the page to open the simulation). Oh yes. You heard correctly. If you are a teacher, this should excite you. If you are a teacher from Alabama, this should excite you to the point of bone-tingling. If you are an Alabama history teacher, this should make you gasp in awe as you say, "No stinkin' way!" (which is exactly what I did). Alabama tends to claim the Tuskegee Airmen even though the men came from all over the U.S. because the training base was in Tuskegee, Alabama, but - check it out - this website/simulation was made by the National Air and Space Museum. National.

When I saw that this simulation exists, I immediately wanted to play, and before I even played, I immediately wanted to give this to students as a super-fun-they-have-no-idea-that-they-are-learning assignment. In the simulation, the students learn what the Airmen needed when they flew (puh-lease take the time to look up why they called life vests a "Mae West" so you can give your students the tame version before playing...for those of you who know who Mae West is/was, I'm sure you can use your imagination...), and then they get to make all the decisions that a flight leader would have made on a mission. The picture above is actually deceiving because that is actually a screenshot of one of the only times the students are not given the opportunity to make a choice. Usually, there are two choices (red boxes), and the choice affects the rest of the course.

I will say - if you/your students/whoever is playing has seen the movie Red Tails - which is an amazing movie that will really help you better understand what the Tuskegee Airmen went through and did by the way - you/your students/whoever is playing will probably know the best decisions to make (for the most part) already. I encourage you (and your students) to try all the different decisions in multiple attempts of the game in order to see how each decision affects the course of the mission, anyway, though.

I am SO EXCITED about this one, still. .......Yep, still excited.

Enjoy!

Thursday, February 9, 2012

Making the Letters to Mrs. Roosevelt Look Old, Aged, & Authentic

Before anything else, print off some old stamps like these on the left. No, I didn't make these look old. They printed out that way! There are several at this website. I am not sure all of them apply, but that's ok. From what I can tell, the cost of the stamp was determined by the size of the letter or package so all of them were used during this time period. The one, two, and three cent stamps seem to be the most likely ones that would be seen on the kinds of letters we are making. After printing the stamps, cut them out. They do not have to be cut out perfectly. Just wiggle the scissors back and forth as you cut to make the zigzag-ish effect on the stamps. They are old; they shouldn't look perfect.

Here are the rest of the steps:
Pictured Above is all the stuff you'll need:
- Some plastic to cover your workspace (I cut open an old shopping bag)
- Envelopes (Mine are assorted sizes for authenticity...and because I ran out of the larger kind.
- Brown paint (Mine is acrylic, but finger paint/tempera paint works, too.
- Paper Towels (Just in case...)
- Assorted Pens
- Glue Stick
- Sponge Brush
- Small Paintbrush (For stirring...)
- A Cup or Mug
- and Water, which is not pictured because I got the water from my sink which was in a different location than my desk.

Step One: Pour a little brown paint into your cup or mug.


This looks about right.


Step Two: Add water until it resembles muddy water. I would guess that this about 3/4 cup. Stir with a paintbrush so that the brush part can get the paint off the bottom as it is stirred into the water. It should be as thin and as runny as water.
Time out for just a second: Can you see what this mug says on the side? "The only thing children wear out faster than shoes are parents and teachers." Smile.
Step Three: Dip the sponge brush into the brown paint water. Press the sponge against the side to get rid of excess. Repeat every time you use this brush.
 Step Four: There are actually a few ways to do this part. One way is to just paint the letter front and back. I don't know if you can tell, but I love how this particular letter is addressed to, "Dear Mrs. Lady."
There is no real technique to it. Just paint until there is no white space left.

Turn it over, and...

...paint the back the same way.
Here is another way that was invented when I got tired of painting all of the letters. This way gets some of your frustrations out, and it gets delightfully messy. (FYI: Pictured at left is a completely different letter than the "Dear Mrs. Lady," one.):

Crumple the letter into a wad.

Dunk it into the paint water. Submerge it all the way before taking it out of the water. (Please NOTE: Do not wring it out. I forgot that I shouldn't do that, and it made it very difficult to unfold later. Just let it drip into the cup.)

Unfold the letter and lay it flat. If it tears, that's ok. This letter is supposed to be super old and fragile. It adds to the character of the letter. Sometimes the rips and tears freak students out a bit, but once you tell them that they were already like that, they seem to make peace with it.
Step Five: Paint the envelope back with paint water.

Turn it over, and paint the front, too. Try not to get the parts that have glue (like the seams that hold the envelope together) too wet. If the seams get to wet, the entire envelope will fall apart. Fortunately, scotch tape had been invented by the 1930's. Surely they would have had some at the White House to repair these letters...

Make sure you paint the front flap like this. If you paint it on the other side, you will just get the seams more wet, and you don't want that.

All painted!
Here's another way to age an envelope. 

Crumple up the envelope - because it is SO much fun!

Do NOT dunk it! It will make the seams too wet, and the envelope will fall apart. Paint the envelope. Let the paint water settle into the wrinkles...

...like this. Let it dry a bit, then flip it over, and paint the other side.
Step Six: Let everything dry! When I did this the first time, I laid out a couple of garbage bags I had cut apart in the floor so I could lay the letters and envelopes on them to dry. Then...


...this came along. "This" would be my dog Buddy, and his snowman that he got for Christmas...and about four blankets and two pillows that he stole to make a "nest." He is dazed by the camera flash that awoke him from his nap. He has a thing about laying on any papers in the floor, so last time, I moved everything from the floor to all of the couches and my bed. This time there are only two of each because I have already done all of mine before. :)
.....
Step Seven: Once they are dry, apply glue to every edge and corner to the back of the stamps before adhering them to the envelopes.
Step Eight: Press the edge of the stamp to the envelope. Look how weird my fingers look!
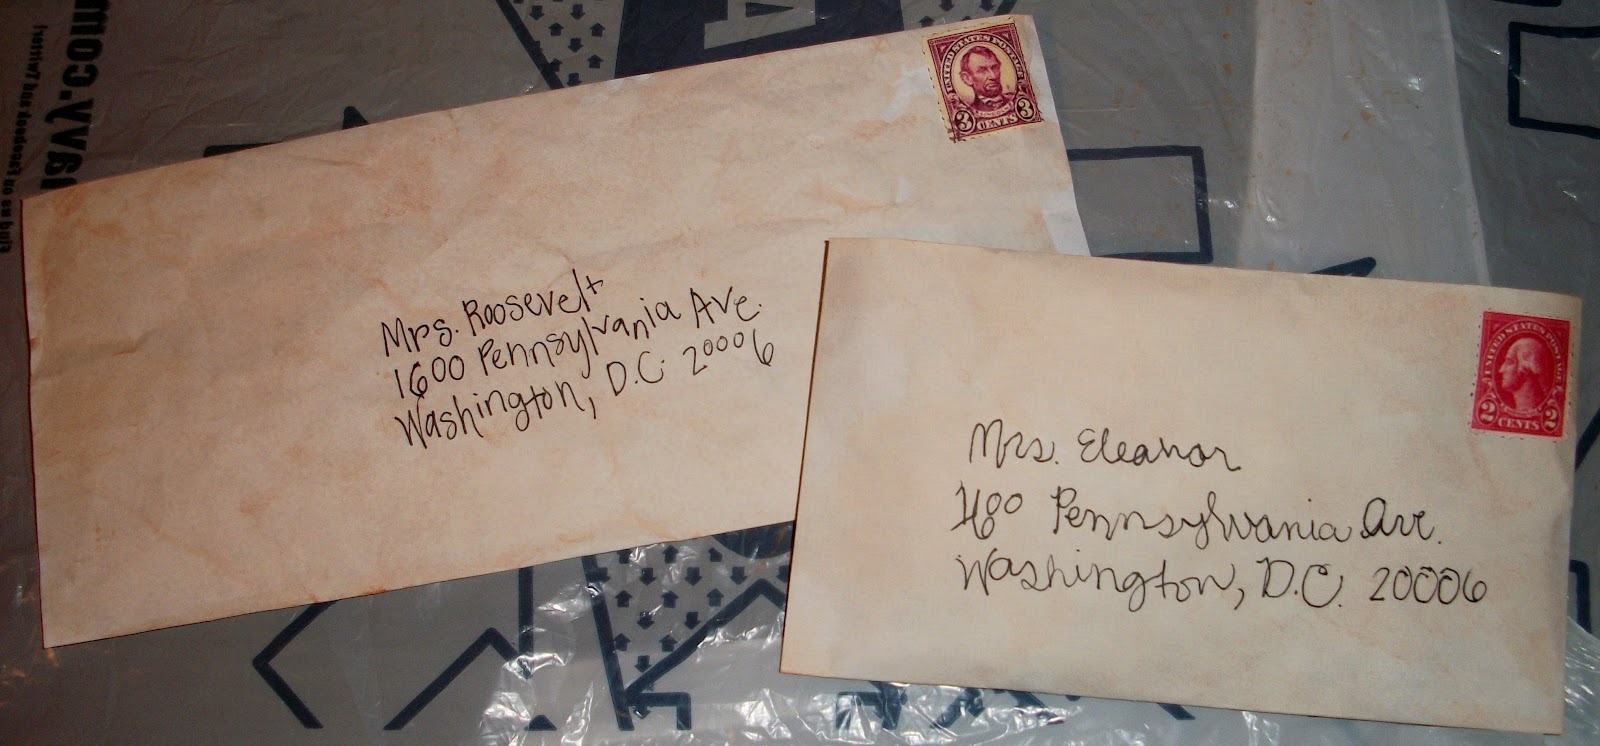
Step Nine: Use various pens to address the envelopes to Mrs. Roosevelt. The address is 1600 Pennsylvania Avenue, Washington, D.C. 20006. I actually took mine to church and asked lots of random people to address them so that they would have various handwritings. The ones that turned out the best were from senior adults. Their handwriting had that pretty old style. Asking other people to address the envelopes also varied the way Mrs. Roosevelt was addressed. Some said "Eleanor Roosevelt," some said "Mrs. Roosevelt," and one even said "First Lady."

Step Ten: Look how wrinkled and ripped the one on the right is. They are both dry, so fold them to be stuffed into envelopes. 

Step Eleven: Stuff them into the envelopes however you can (especially for itty bitty envelopes).

Step Twelve: Do not seal them shut! Just tuck in the flaps so that they can be used over and over again.  
Ta-Da!
I hope you enjoyed this tutorial! Let me know how you use these in your classroom.

Enjoy!

Friday, January 20, 2012

Books I Want...Well, Only A Few of Them

Ok, so there are a LOT of books that I want, but here are a few of the ones that pertain to Alabama history that I want:
Finding Lincoln
Finding Lincoln by Ann Malaspina
This book is set in Alabama in the 1950's. Louis needs to use the library to do a report on Abraham Lincoln, but the library is for whites only.


Marching For Freedom: Walk Together Children and Don't You Grow Weary
Marching for Freedom: Walk Together, Children, and Don't You Grow Weary by Elizabeth Partridge
This book is about the children of the Civil Rights Movement, and it features black and white photos documenting the Civil Rights Movement with special attention paid to children. The book includes the Selma to Montgomery March.


Claudette Colvin: Twice Toward Justice
Colvette Colvin: Twice Toward Justice by Phillip Hoose
This book is about a teenager in Montgomery, Alabama who did exactly what Rosa Parks did....nine months earlier. She not only was not celebrated, she was shunned by her peers. This book should give a closer look into the complexities of the Civil Rights Movement. I told my students every year that to an extent Rosa Parks just got lucky. There were more people than her refusing to give up their seats. This book proves the point.


*NOTE: I have not read any of these books yet, and I have reason to believe that part of one of these books may not be appropriate for  4th graders. I want the books just the same, though. :)

Wednesday, January 11, 2012

History From Hoover to Roosevelt & Letters to Mrs. Roosevelt from Children Two-Part Activity

For whatever reason, The Great Depression is a time period that is near and dear to my heart. My grandparents lived through The Great Depression. They had their first children during that time, and one of their very first babies almost starved to death. Condensed milk came to his rescue. It is the time period in which my mom's favorite show, The Waltons, is set. It is the time in which a handicapped man became the symbol of strength, determination, and courage. My dad also contracted polio (many years later), but he exhibits some of the same characteristics for which Mr. Franklin Delano Roosevelt is remembered. Physically, he walks with a limp. Character-wise, he always presses on. He never says can't.

Those of us who know what that time period was like from the stories of our grandparents, through books, through movies, through documentaries, through blog posts, etc. have a respect for those people. When economic times are tough, we think of that time period. We think, "They made it through; we can, too." Students need to know about that time period. They need to know the desperateness of the situations of the people of that time. They need to know that kids of the Great Depression longed to be able to eat at all each day, to own any article of clothing at all, etc. They need to know that this time period existed so that they can appreciate today... because it isn't yesterday.

This activity is a two-part activity. The first is a PowerPoint presentation that gives the students a picture of history at that time from the time Hoover was in office to the time Roosevelt was in office. The PowerPoint is only supposed to give the students enough background knowledge to help them understand the letters they are about to read. The second part consists of reading letters from children to Mrs. Roosevelt.

These letters are copies of actual letters to Mrs. Eleanor Roosevelt from children during the Great Depression. We teachers call this a primary source. Something magical happens when a student gets to hold a primary source. As they (the students) so eloquently put it, "It makes history less boring." The letters to Mrs. Roosevelt range from children asking for used underwear to children asking for bikes and dolls. We know that the requests in these particular letters were never granted. Mrs. Roosevelt was very charitable and she answered a lot of requests, but she was only one person. She couldn't answer them all by herself.

It is a thing of beauty to hear 4th graders saddened and/or angered by the fact that a child didn't have clothes and that the President's wife didn't grant clothes to that child. I do not facilitate these conversations. I give the students questions to answer for each letter, and they are allowed to discuss within their groups. I just walk around and listen. I rarely have to say a word. Students help each other understand what they do not understand. Students talk through how they feel as they answer the questions. I don't have to tell them to; they just do.

The questions sheet used to include a question that said, "Do you think the writer's request should be granted? Why or why not?" for each and every letter. The students inevitably said, "Yes" to every letter. Now, after the students have read all of the letters that they have had time to read (usually about four each), I ask them, "Pretend that you are only able to give one of these kids what they asked for. Of the letters you read, which one would you choose and why?" I always look forward to reading these responses more than any of the others.

Anyway, enough of my babbling. Here is the activity:
  1. Show From Hoover to Roosevelt Powerpoint. The last slides will explain what children will do during the Letters to Mrs. Roosevelt activity.
  2. Randomly give out the Letters to Mrs. Roosevelt letters to students; Give out Letter Questions Sheet (I usually run a copy of this on the front and back so that students have four sets of the questions which is enough for them to respond to four letters).
  3. Explain your expectations for the activity including how much time the students will have to complete the activity (I usually give two history class times for the combination of the PowerPoint and letters activity). You may even want to respond to a letter on the Letter Questions Sheet in front of the class as a model. Depending on your comfort level and your students, you may allow students to complete the activity independently or in groups. If your students can handle working in groups, I recommend it. The students learn a lot from each other. I usually leave extra letters at the front of the room so that students can get a new letter as they finish reading and responding to a letter.  
  4. About twenty minutes before time is up, ask students to answer the following question on another piece of paper: "Pretend that you are only able to give one of these kids what they asked for. Of the letters you read, which one would you choose and why?"
I will post how I make the letters seem more authentic and old in my next post.

Enjoy!

Tuesday, January 10, 2012

Movie for WWI: Sergeant York

Ok, so Sergeant York is about a WWI hero from Tennessee, not Alabama. This is such a good movie about WWI, though. Since it was made in the early era of movies, there are war scenes, but there is no blood and no gore. The movie is in black and white, and when I tell students that it is in black and white, they all make that disappointed sound. I assure them, though, that this movie and To Kill A Mockingbird are two movies that are so good, that I do not mind that they are in black and white. (It has Gary Cooper in it for crying out loud! I always wanted to know what he was like because Lucy, of I Love Lucy, so often described certain men as a "Gary Cooperish" type.) Usually by the time the students see Sergeant York in a shooting contest, they are hooked. I have never been able to show it all in one afternoon, and both years the kids have just about driven me crazy asking when we are going to see the rest of the movie.

Watch it before you show it to the kids. They will ask questions as the movie goes along. Answer them as they ask even if you have to pause the movie every once in a while. From this movie: they will gain an understanding of what life was like in the rural South back in this time period, what boot camp and training was like for these soldiers, and what war was like with all of the new technology of the time. Possibly most importantly, they also get to experience the story of a truly humble war hero whose intelligence was gained in the backwoods of the South and whose integrity ran so deep that it influenced a nation (They even made a movie about him! :) ). You may want to mention that if any of them take a trip to the Smoky Mountains in Gatlinburg, they will see a sign on the interstate for the Alvin C. York VA Medical Center. I have had so many students come back and tell me that they saw his sign.

I do not do any written response on this movie. Sometimes we teachers can kill a good thing. I find that there are so many good questions and discussion throughout and after the movie, that there is no need to beat it to death with anything else. I do, however, do a project in which the students may choose to research the technology of WWI as one of their research topics. I will try to post that project soon.

If anyone ever finds that this movie has been restored to a color version, please let me know! Let me know if you use this movie in your class, and the impact it had on your students (and you!), too.

Enjoy!

Friday, January 6, 2012

Archaeology Adventure Archaeological Dig Activity Kit

Three years ago, I started teaching 4th grade. I was determined to make as much of my curriculum fun as I could. So anytime anything wasn't fun, I noticed. I'm sad to say that of all the subjects I taught that year, Alabama history was fun least often. I had not had Alabama history since I had been a 4th grade student myself. I remembered some things about Alabama history from back then (believe it or not), and some subjects in Alabama history were really just American history with Alabama contributions mixed in. The purely Alabama history subjects that were about areas other than the one in which I live were read from the book and discuss lessons. BO-ring.

One of those BO-ring lessons that stood out in my mind was the lesson about Moundville, a place where early Native Americans buried their dead in huge mounds along with their earthly possessions. After that lesson, I felt that the students just didn't "get" how cool Moundville is. They didn't get how cool it is that the mounds still exist, that artifacts are still being found even though the people lived in an ancient time, and that archaeologists are able to learn what those people were like based on what they found/are finding.

So, two summers ago, I was determined to find and make resources to make my history lessons more meaningful and fun. The first thing I did was look for something like this:
An archaeology kit that allows an entire class of students to experience an archaeological dig. But I didn't find it until today!

I did find other kits that were hundreds or even thousands of dollars. Some of those had real artifacts that had to be sent back...completely intact. Yeah right. I teach elementary school...and I am clumsier than my students.

This kit looks great and appropriate for elementary school. The kit includes many artifacts which include beads, arrowheads, pottery shards (that will piece together to make pottery), animal bones (replications), and shells, as well as an archaeology digging screen. The teacher can simulate these into an actual dig site (like in the dirt outside) so that the kids can participate in an excavation, and the students can draw conclusions based on the artifacts after they have dug them up.

The kit costs $69.95 and includes enough artifacts for 25 students to make arrowhead necklaces. They also offer refill packs of arrowheads, bones, beads, shells, and necklace cords that can be bought for groups larger than 25. Personally, I would probably save the artifacts and reuse them, but the necklaces look like fun, too! Visit the website to see refill prices.

Caution:
The teacher will have to supply digging tools for the class. I am going to look for some, and I will let you know as soon as I find some!

UPDATE:
I found the following tools (4 out of 5 came from Amazon.com) that may work well for this archaeology dig activity:

This set includes 12 wax carvers that look a whole lot like some of the archaeologist tools I have seen on the Internet. There are other pictures of these on the website, and they look pretty blunt, but I do not know that for sure. They are not all they same, but they do not all need to be the same. For this activity, I just want the kids to get the idea of what archaeologists do.

Since I live in an area of Alabama clay (yep that famous red dirt that Warner Von Braun thought would be magnificent for NASA), I think these wax carvers would be great for getting that thick stuff off of whatever is buried in it. [I need to find an area that has a good mix of dirt and clay...or the following sieves will have no point.]

These would be great for sifting dirt. I'm not sure how big they are though; they look pretty small.

This set includes 4 buckets - 3 with sieve bottoms and 1 with a solid bottom. The buckets are pretty small, they are 7" high.

Let me pause now and point out that it may be wise to ask any teachers in the younger grades if they have any of these kinds of play toys that they use in sand and/or water tables that you may borrow. You may even want to e-mail the staff at school to see if anyone with young children have these kinds of toys you can borrow. ...Just a thought...and now to continue:

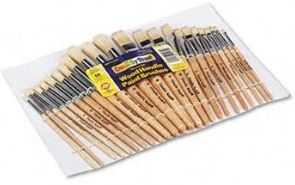
You probably already have paintbrushes or you know where you can borrow some. If not, these are pretty cool. This set includes a 24 pack of assorted paintbrushes. You can actually get them cheaper on the same site ($7.33 on Amazon), but you would have to pay shipping.

If you would like to go the extra mile...
This kit comes with 4 brushes, 4 sieves, and 24 plastic dinosaur skeletons. The brushes and sieves would be useful for this archaeology excavation, and this kit is actually pretty cheap.
If the dinosaur skeletons do not break easily, it may be fun to bake the little plastic dinosaur skeletons into big sheet cakes or individual cupcakes for a paleontology excavation activity. A variety of sweets could even be used to make strata - pudding, packed crushed oreos, cake, frosting, etc. I'm not sure how easily the dinosaurs break, so use caution when deciding whether or not to use that idea.

Let me know if you and/or your class use these activities! I would love to hear about it. I would love to see photos, too!

Enjoy!

Wednesday, November 2, 2011

Scholastic's Interactive WWII Home Life Activity

Let me tell you how absolutely amazing Scholastic is. Here is the link to their WWII American Home Front Home Life interactive activity. The interactive activity lets students click on different items in the living room and kitchen of a home front WWII family home. The item links open to show primary sources including photos, posters, and more, and some play audio files such as Roosevelt's inauguration speech and public service announcements. Each primary source link also includes a brief description of each primary source and its significance to the war effort during WWII.

I had actually decided that Scholastic (and its website) is amazing a long time ago, but I love it even more now! You see, I actually found this activity a week or so ago, and the audio files would not work. I did everything I could to my computer - I cleared my cookies, I deleted history, restarted my computer, downloaded updates, made sure I had the latest versions of everything, downloaded some more, restarted my computer again...you get the drift.

I was so excited about the audio files because that was one kind of WWII resource that I really felt like I was lacking. I know I haven't posted any of the WWII stuff to the website yet, but there is a lot of stuff coming!

Anyway, the audio files still were not working after all of my troubleshooting, so I contacted Scholastic. They sent me an e-mail that let me know that they would be working on the problem. Not much later, they let me know that they had fixed the problem! I was so excited. I went straight to the website to try to listen to those audio files (and I realize you are smirking at my geekiness).

They still wouldn't work for me! Scholastic worked on their website for me for over a week so that those audio files would work! You and I, thanks to Scholastic, now have access to this completely working interactive WWII American Home Front Home Life activity!

Enjoy!

Thursday, October 20, 2011

New History Activities! Early American Settlements and The First Thanksgiving

So, I got around to some of the history links sooner than I thought! I posted eleven new history activities on the student history page in a new section called Early American Settlements and The First Thanksgiving. The subjects of the activities include Pilgrims, Wampanoag Native Americans, the Mayflower, the First Thanksgiving, and more. There are even panoramic views of Plimoth Plantation and the inside of a Wampanoag home! I'm sure you and your students will love every activity!
Enjoy!